Your Yamaha outboard engine lasts longer if you use the flush port correctly. If you boat in saltwater, flush your outboard after every single trip. A clean-water flush pushes out contaminants like sand, silt and mud from your cooling passages. It also removes salt deposits that can harm cooling and cause corrosion in the engine block. Many newer Yamaha outboards can be flushed with simpler methods; you don’t even need to start the engine.
Here’s the best part: you don’t need advanced mechanical skills to flush your outboard well. This step-by-step guide shows you where the flush port is, the right attachment to use, and the whole process. You’ll learn how to connect a garden hose and maintain appropriate water pressure. These simple steps help keep your engine running smoothly for years.
Why Flushing Your Yamaha Outboard Matters
Regular maintenance protects your investment. A proper flush helps you deal with the marine environment and can substantially extend engine life.
Salt Buildup and Corrosion Risks
Corrosion attacks your outboard inside and out, it never stops, regardless of water type. Saltwater causes the most damage because it naturally corrodes everything it touches. Left inside your engine after use, saltwater keeps eating away at metal parts. Saltwater can also form crystals at temperatures above 170°C, which can block cooling passages.
The damage goes beyond what you can see. Parts that don’t contact water directly, like exhaust systems, can suffer “dry corrosion”. Modern fuels with ethanol may create harmful sulphate salts that concentrate damage in hot areas where cooling passages aren’t clean.
How Flushing Improves Engine Life
A freshwater flush removes contaminants like sand, silt and mud from your cooling system. It also clears salt deposits that cause poor cooling and corrode the engine block and mid-section. Regular flushing keeps passages clean so your engine runs cooler and resists dry corrosion better. This simple maintenance:
- Stops corrosion throughout the cooling system
- Keeps cooling passages clear
- Helps your water pump impeller last longer
- Keeps your cooling system running at its best
When Flushing Is Most Important
Make flushing part of your regular maintenance routine, especially when you have:
- Used the outboard in saltwater—flush it every time
- Run in dirty or debris-filled water
- Used it in freshwater (add flushing to your regular service routine)
Monthly flushes aren’t enough. Waiting even a day after a saltwater run lets corrosion start. Flush right after each trip.
Step-by-Step: How to Use the Yamaha Outboard Flush Port
A proper flush needs the right sequence and a little attention to detail.
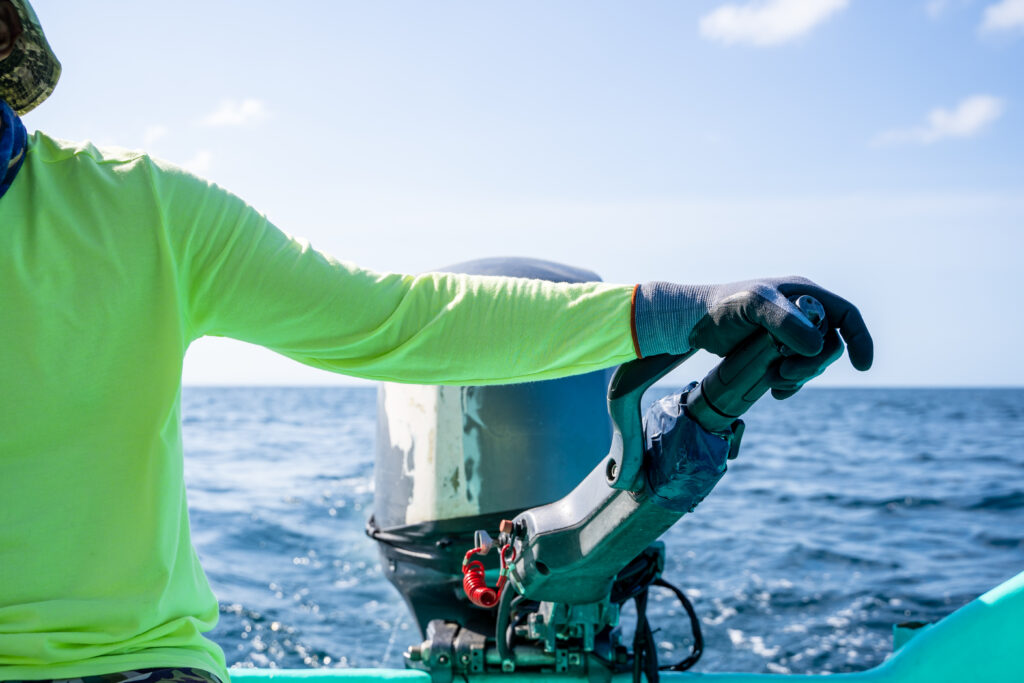
Step 1: Locate the Flush Port on Your Engine
The quick-access flush port sits on the port side of most Yamaha outboards, usually near the lower rear cowling. You’ll see a threaded cap that shields the connection point when not in use.
Step 2: Connect the Garden Hose Securely
Remove the flush-port cap completely and let any saltwater drain out. Attach your garden hose straight to the flush fitting. A hose with an on/off quick connector at the end helps you control flow easily.
Tip
Line up threads carefully and start by hand to avoid cross-threading.
Step 3: Turn On the Water Supply
Make sure the connection is tight, then open the hose valve. Use steady household pressure; enough to move water through the system without being excessive. Look for water exiting from several spots, including around the prop hub, the backside of the gearcase and the pitot tube outlet.
Note on Pressure
For general cooling-system checks, about 75 kPa (≈11 psi) water pressure is typical guidance; for flush-port use, gentle to moderate hose pressure is sufficient. Too much pressure isn’t helpful.
Step 4: Let the Water Run for 5–10 Minutes
Run freshwater through your engine for 5–10 minutes. Flushing right after you dock (while the engine is still warm) helps; thermostats are more likely to be open, which improves the flush.
Step 5: Turn Off the Water and Disconnect the Hose
Close the valve, then remove the garden hose from the flush fitting. Keep debris away from the open port.
Step 6: Reattach the Flush-Port Cap
Refit the cap, thread it correctly and tighten it well. A loose cap can contribute to overheating on future runs.
Best Practices for Flushing Yamaha Outboards
Flush Immediately After Saltwater Use
Timing matters. Flush straight after you come off the water, while the engine is still warm. Passages remain open, and salt crystals haven’t formed yet.
Keep the Engine Vertical to Drain Properly
Keep the outboard vertical during the entire flush so gravity can drain water, salt and debris from the passages.
Avoid Running the Engine During a Flush
Unlike ear-muff or bag flushing methods, the flush-port method does not require the engine to run. Running the engine on a hose without adequate water flow can quickly overheat and damage it.
Check for Water Flow From the Tell-Tale
Watch the tell-tale (the small water outlet at the lower rear of the cowling). A steady stream indicates cooling water is moving correctly. A weak/uneven flow may suggest a blockage that needs attention.
Common Mistakes and How to Avoid Them
Cross-Threading the Flush Fitting
Plastic threads can be damaged if forced against metal hose fittings. Start connections by hand and avoid over-tightening.
Flushing With the Engine Running (When Not Required)
Yamaha cautions against running the engine during flush-port use. Without proper intake water, overheating damage can occur within minutes. Only run the engine when using external ear-muffs that supply water to the intakes, and follow manufacturer guidance.
Using Low (or Excessive) Water Pressure
Poor flushing often comes from weak flow, but excessive pressure isn’t better. Use steady household pressure and avoid blasting the system.
Skipping the Flush After Dirty-Water Use
After running in silty or muddy water, a flush helps clear material that can wear the impeller and block passages.
Need a Hand With Yamaha Outboard Parts?
If you’re maintaining a Yamaha outboard and need quality parts or accessories, the team at Victory Parts can help. Browse the range, or reach out for friendly advice on what suits your setup and routine maintenance. Keep your outboard happy (and your weekends on the water) without the fuss.